Table of Contents
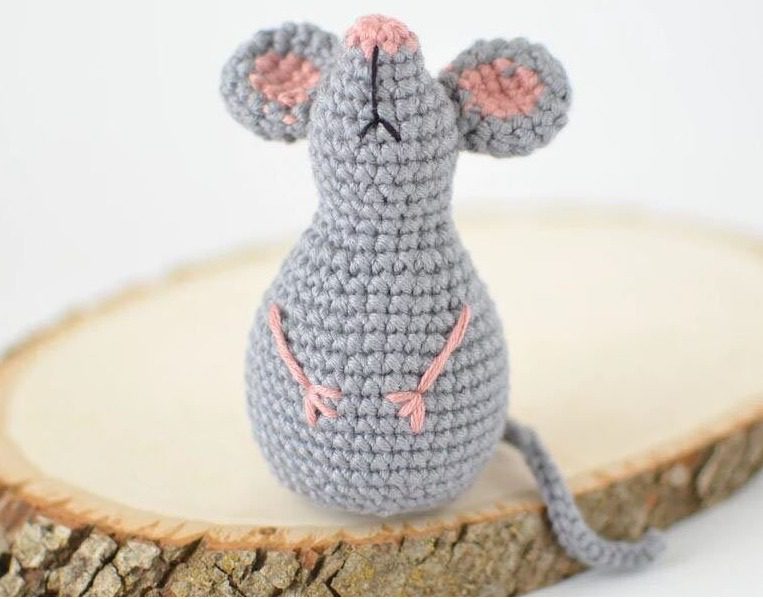
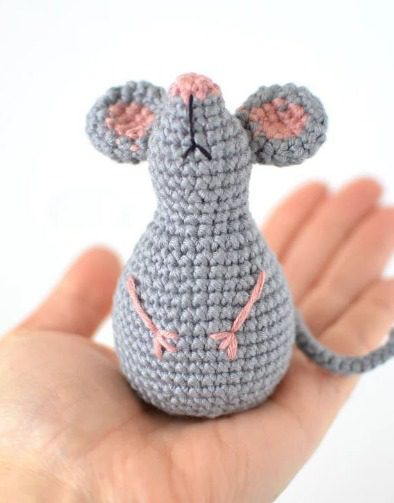
Looking to create an adorable pocket-sized mouse amigurumi? This comprehensive crochet pattern will guide you through making a charming little mouse with a pink nose, delicate ears, and a long tail. Perfect Mouse Amigurumi for beginners, this small project works up quickly and makes a delightful gift or addition to your handmade collection. At just 3.5 inches tall and 2.5 inches wide, this sweet mouse is the perfect size for little hands or as a cute desk companion.
Introduction to Mouse Amigurumi
Amigurumi, the Japanese art of crocheting small stuffed toys, is particularly well-suited for creating tiny creatures like this mouse. The pattern uses simple techniques to create the mouse’s round body, expressive face, and distinctive features. By combining pink and gray yarns, you’ll capture the essence of this lovable rodent in an irresistibly cute form that’s perfect for animal lovers of all ages.
Mouse Amigurumi Skill Level and Prerequisites
This pattern is rated as beginner-friendly. To successfully complete this mouse amigurumi, you should be comfortable with:
- Creating a magic ring
- Working in continuous rounds
- Basic crochet stitches (primarily single crochet)
- Working in back loops only
- Simple color changes
- Basic embroidery for facial features
Mouse Amigurumi Materials Needed
Before starting your mouse amigurumi project, gather these supplies:
- Light weight (category 3) yarn in:
- Pink (for nose, color accents, and embroidered arms)
- Gray (for body, ears, and tail)
- Classic cotton thread in black (for eyes and mouth embroidery)
- Crochet hook size C2/2.75mm
- Polyester fiberfill stuffing
- Yarn needle
- Scissors
- Stitch markers (optional, but helpful)
Mouse Amigurumi Finished Dimensions
When completed, your mouse amigurumi will measure approximately:
- Height: 3.5 inches (8.9 cm)
- Width: 2.5 inches (6.4 cm)
Crochet Terminology
This pattern uses standard US crochet terminology:
- MR: Magic Ring – a technique for starting crochet in the round
- St: Stitch – a single unit of crochet
- Sl st: Slip stitch – used to join rounds
- Sc: Single crochet – the primary stitch used throughout the pattern
- BLO: Back loop only – creates a visible ridge in the design
- Inc: Increase – making two stitches in the same stitch
- Dec: Decrease – combining two stitches into one
- F/O: Fasten off – securing and ending your work
- Ch: Chain – the foundation of crochet work
Mouse Amigurumi Working Method
Unless otherwise specified, this pattern is worked in joined rounds. At the end of each round, join with a slip stitch and chain 1 before beginning the next round.
Mouse Amigurumi Body Instructions
Using pink yarn for the nose and gray for the body:
Round 1: Using pink yarn, create a magic ring and work 8 single crochet into it. (8 stitches) Round 2: Switch to gray yarn, single crochet in each stitch around. (8 stitches) Round 3: Work [3 single crochet, 1 increase] 2 times. (10 stitches) Round 4: Work [4 single crochet, 1 increase] 2 times. (12 stitches) Round 5: Work [2 single crochet, 1 increase] 4 times. (16 stitches) Round 6: Work [3 single crochet, 1 increase] 4 times. (20 stitches) Rounds 7-8: Single crochet in each stitch around. (20 stitches) Round 9: Work [3 single crochet, 1 decrease] 4 times. (16 stitches) Rounds 10-11: Single crochet in each stitch around. (16 stitches) Round 12: Work [3 single crochet, 1 increase] 4 times. (20 stitches) Round 13: Work [4 single crochet, 1 increase] 4 times. (24 stitches) Round 14: Single crochet in each stitch around. (24 stitches)
Begin stuffing the body at this point.
Round 15: Work [5 single crochet, 1 increase] 4 times. (28 stitches) Round 16: Work [6 single crochet, 1 increase] 4 times. (32 stitches) Round 17: Work [3 single crochet, 1 increase] 8 times. (40 stitches) Rounds 18-24: Single crochet in each stitch around. (40 stitches) Round 25: Work [3 single crochet, 1 decrease] 8 times. (32 stitches) Round 26: Single crochet in each stitch around. (32 stitches) Round 27: Working in back loops only, work [2 single crochet, 1 decrease] 8 times. (24 stitches) Round 28: Working in both loops, work [1 single crochet, 1 decrease] 8 times. (16 stitches)
Complete stuffing the body firmly.
Round 29: Decrease around. (8 stitches)
Fasten off, leaving a tail. Use the tail to close the remaining hole and weave in the end securely.
Ear Instructions (Make 2)
Using gray and pink yarn:
Round 1: With gray yarn, create a magic ring and work 6 single crochet into it. (6 stitches) Round 2: Increase in each stitch around. (12 stitches) Round 3: 1 single crochet, 1 increase, 1 single crochet, switch to pink yarn, 1 increase, 1 single crochet, switch back to gray yarn, 1 increase, [1 single crochet, 1 increase] 3 times. (18 stitches) Round 4: Continuing with gray yarn, 3 single crochet, switch to pink yarn, 5 single crochet, switch back to gray yarn, 10 single crochet. (18 stitches) Round 5: Repeat Round 4. (18 stitches) Round 6: With gray yarn, 1 single crochet, 1 decrease, switch to pink yarn, 1 single crochet, 2 decreases, switch back to gray yarn, [1 single crochet, 1 decrease] 3 times, 1 single crochet. (12 stitches) Round 7: With gray yarn, work [1 single crochet, 1 decrease] 4 times. (8 stitches)
Fasten off, leaving a long tail for sewing the ear to the body between rounds 5-8.
Tail Instructions
Using gray yarn:
Chain 31 stitches. Starting from the second chain from the hook, work 1 slip stitch in each chain across. (30 slip stitches)
Fasten off, leaving a long tail for attaching to the back of the body between rounds 24-25.
Facial Features and Final Details
- Arms: Using pink yarn, embroider arms between rounds 15-22 of the body.
- Mouth: Using black cotton thread, embroider a mouth between rounds 1-7 of the body, centering it on the pink nose area.
- Eyes: Using black cotton thread, embroider eyes between rounds 4-6 of the body, positioning them above and to either side of the pink nose.
- Ears: Attach the ears to the top of the head between rounds 5-8, spacing them evenly apart.
- Tail: Sew the tail to the back of the body between rounds 24-25, creating a slight curve for a natural look.
Assembly Instructions
- First, ensure the body is firmly stuffed, especially in the head area.
- Position and attach both ears to the top of the head, between rounds 5-8. The pink inner part of the ears should face forward.
- Embroider the eyes between rounds 4-6, placing them on either side of the pink nose area. Use small, tight stitches for a neat appearance.
- Add a simple embroidered mouth below the nose using black cotton thread.
- Using pink yarn, embroider the arms on either side of the body between rounds 15-22. You can create a simple line or a slightly curved shape to suggest paws.
- Attach the tail at the back of the body between rounds 24-25. Position it with a slight curve for a more natural appearance.
- Check that all parts are securely attached and embroidery is firmly in place.
Customization Ideas
Make your mouse amigurumi uniquely yours with these creative variations:
- Create a white mouse by substituting white yarn for the gray
- Add tiny whiskers using stiffened black thread or thin wire
- Make a sleeping mouse by embroidering closed eyes (small curved lines)
- Create a family of mice in different sizes by adjusting your hook size
- Add a tiny scarf or hat for a dressed-up mouse
- Embroider small pink toes on the arms
- Make mice in different colors for a rainbow collection
- Add a small piece of cheese made from yellow felt or yarn
Troubleshooting Tips
- If your mouse won’t sit properly, try adjusting the stuffing in the lower body
- For more defined features, use a slightly smaller hook for the face area
- If the ears seem floppy, add a small stitch to secure them in an upright position
- To keep the tail curved, lightly stitch it in place at multiple points
- If your mouse looks oddly proportioned, check that you’ve followed the stitch counts correctly in the body shaping rounds
Care Instructions
Keep your mouse amigurumi looking its best with these care tips:
- Spot clean with a damp cloth and mild soap as needed
- Allow to air dry completely
- Avoid machine washing or drying
- Store in a clean, dry place away from direct sunlight
- For dusty mice, use a soft brush or compressed air to clean gently

Check this out :Adorable Valentine Bear Amigurumi Crochet Pattern
Conclusion
Congratulations on completing your mouse amigurumi! This little critter makes an adorable addition to any collection or a sweet gift for animal lovers. The combination of the pink nose, delicate ears, and long tail captures all the charm of a real mouse in an irresistibly cute form.
The skills you’ve developed while making this project will serve you well for future amigurumi adventures. Each handmade creation has its own unique personality, making your mouse one-of-a-kind. Happy crocheting!


Leave a Reply