Table of Contents
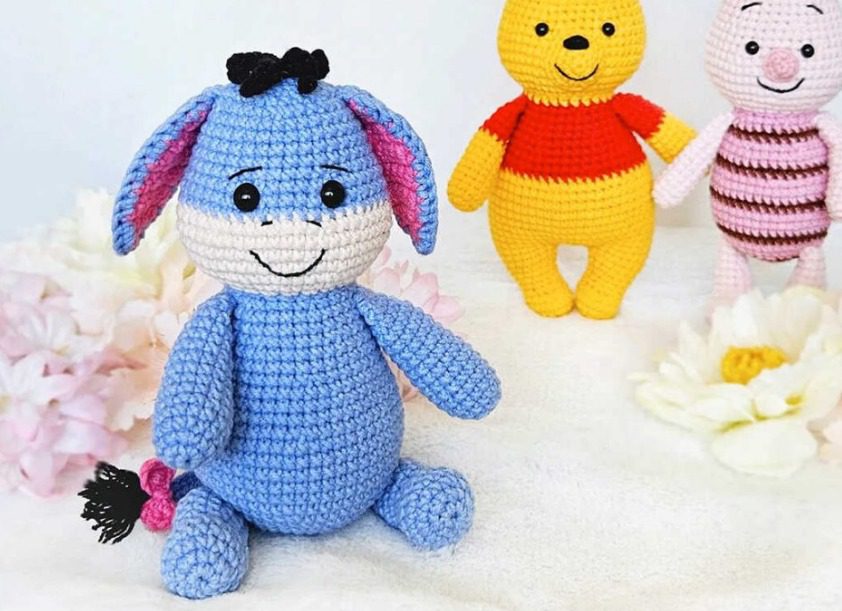
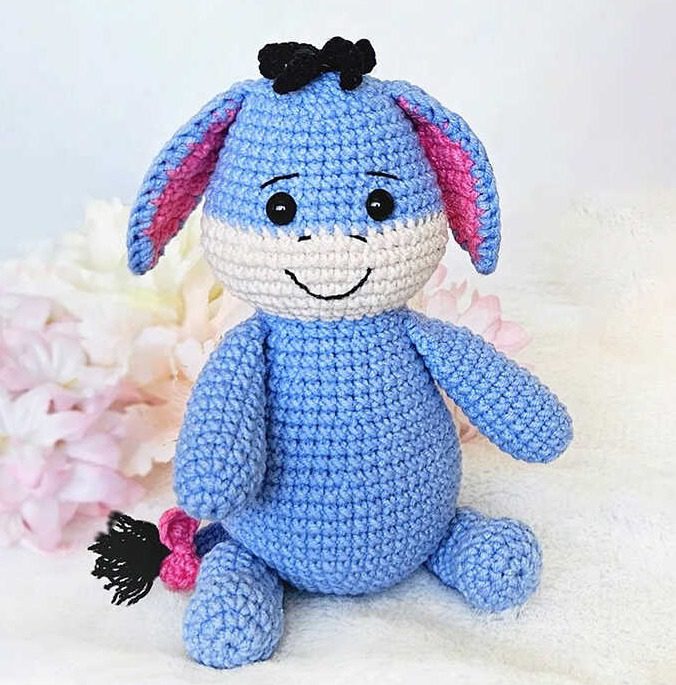
Creating a charming amigurumi donkey is a delightful project for Amigurumi Donkey crochet enthusiasts of all skill levels. This step-by-step guide will walk you through crafting your own cuddly blue donkey companion with adorable pink ears. Follow along with our comprehensive pattern to bring this lovable character to life.
Introduction to Your Amigurumi Donkey Adventure
Amigurumi, the Japanese art of crocheting small stuffed toys, has captured the hearts of crafters worldwide. This donkey pattern, originally designed by marizzatoys, stands out with its endearing smile and vibrant color combination. When completed, your donkey friend will measure approximately 14 cm in sitting position, making it a perfect desk companion or gift for animal lovers.
Essential Materials for Your Amigurumi Donkey
Before beginning your crochet journey, gather these materials:
- Sport weight yarn (YarnArt Jeans recommended):
- Blue (color 15) for body, legs, arms, and outer ears
- Bright pink (color 42) for inner ears
- Beige (color 05) for face
- 2 mm crochet hook
- 7 mm safety eyes
- Black thread for facial embroidery
- Stuffing material
- Tapestry needle for assembly
- Scissors
Understanding the Pattern Terminology
Familiarize yourself with these abbreviations to follow the pattern easily:
- Row (R)
- Chain stitch (ch)
- Slip stitch (sl st)
- Single crochet (sc)
- Treble crochet (tr)
- Increase (inc) – work 2 single crochets in the same stitch
- Decrease (dec) – work 2 single crochets together
- Numbers in brackets [#] indicate the total stitch count at the end of the row
- Content in parentheses (#) indicates repeated instructions
Creating Your Amigurumi Donkey Step by Step
Amigurumi Donkey Arms Pattern
Using blue yarn, create two identical arms:
R1. 6 sc into a magic ring [6] R2. 6 inc [12] R3. (5 sc, inc)*2 [14] R4-R13. 14 sc (10 rounds) [14] R14. (5 sc, dec)*2 [12] R15. 12 sc [12] R16. Fold the arm in half and crochet 6 sc through both sides
Fasten off, leaving a tail for sewing. Stuff only two-thirds of each arm with stuffing. Set aside for later assembly – arms will be sewn to the body at round 25.
Amigurumi Donkey Legs Pattern
Using blue yarn, create two identical legs:
R1. 6 sc into a magic ring [6] R2. 6 inc [12] R3. (sc, inc)*6 [18] R4-R5. 18 sc (2 rounds) [18] R6. 3 sc, 6 dec, 3 sc [12] R7. 12 sc [12] R8. (3 sc, inc)*3 [15] R9-R12. 15 sc (4 rounds) [15] R13. (3 sc, dec)*3 [12] R14. 6 dec [6]
Close the opening, fasten off and leave a tail for sewing. Stuff the legs completely as you go. These will be sewn to the sides of the body at rounds 6-8, positioned so the donkey sits properly.
Body and Head Pattern
Begin with blue yarn for the body:
R1. 6 sc into a magic ring [6] R2. 6 inc [12] R3. (sc, inc)*6 [18] R4. sc, inc, (2 sc, inc)*5, sc [24] R5. (3 sc, inc)*6 [30] R6. 2 sc, inc, (4 sc, inc)*5, 2 sc [36] R7. (5 sc, inc)*6 [42] R8. 3 sc, inc, (6 sc, inc)*5, 3 sc [48] R9. (7 sc, inc)*6 [54] R10-R15. 54 sc (6 rounds) [54] R16. (7 sc, dec)*6 [48] R17. 48 sc [48] R18. 3 sc, dec, (6 sc, dec)*5, 3 sc [42] R19. 42 sc [42] R20. (5 sc, dec)*6 [36] R21-R22. 36 sc (2 rounds) [36] R23. 2 sc, dec, (4 sc, dec)*5, 2 sc [30] R24-R25. 30 sc (2 rounds) [30] R26. (3 sc, dec)*6 [24] R27. (5 sc, dec)*3 [21]
Stuff the body firmly, especially in the neck area, before continuing to the head.
Head Continuation
Switch to beige yarn for the face:
R1. 21 inc [42] R2. 3 sc, inc, (6 sc, inc)*5, 3 sc [48] R3. (7 sc, inc)*6 [54] R4-R6. 54 sc (3 rounds) [54] R7. (7 sc, dec)*6 [48]
Switch back to blue yarn for upper head:
R8. 48 sc [48] R9. 3 sc, dec, (6 sc, dec)*5, 3 sc [42] R10. 42 sc [42] R11. (5 sc, dec)*6 [36] R12-R15. 36 sc (4 rounds) [36]
Insert safety eyes between rounds 9 and 10 with 6 stitches between them, ensuring 4 stitches remain visible.
R16. 2 sc, dec, (4 sc, dec)*5, 2 sc [30] R17. (3 sc, dec)*6 [24] R18. sc, dec, (2 sc, dec)*5, sc [18] R19. (sc, dec)*6 [12] R20. 6 dec [6]
Make sure the head is stuffed firmly. Close the opening and hide the yarn inside.
Once the head is complete, use black thread to:
- Embroider the mouth in rounds 4-5
- Create nostrils in round 7
- Add expressive eyebrows in round 11
Ears Creation
Crochet two pieces with pink yarn and two pieces with blue yarn. Crochet in turning rounds.
For each piece: R1. 2 sc into a magic ring [2] R2. ch 1, turn, sc, inc [3] R3. ch 1, turn, sc, inc, sc [4] R4. ch 1, turn, inc, 2 sc, inc [6] R5-R10. ch 1, turn, 6 sc (6 rounds) [6] R11. ch 1, turn, dec, 2 sc, dec [4] R12-R14. ch 1, turn, 4 sc (3 rounds) [4]
For the pink pieces: Fasten off and cut the yarn. For the blue pieces: Don’t cut the yarn. Put a blue and a pink piece together (the blue piece should be towards you) and crochet sc stitches around the ear through both pieces.
Fasten off and leave a long tail for sewing. Sew the ears to the sides of the head between rounds 16 and 17. Sew them down a few rows in the back so they don’t stick out.
Mane Creation
Crochet with the black yarn:
- Make chain 9 and crochet on it: sl st, 4 sc (starting in the second chain from the hook).
- Make a sl st and crochet: (chain 6; sl st, 4 sc (on the chain); sl st in the next stitch)*3
- Fasten off and leave a long tail for sewing
- Sew the mane to the top of the head
You can also make a mane from yarn pieces and sew it to the head as an alternative.
Tail Assembly
- Make chain 16 with the blue yarn and crochet 15 sc on it (starting in the second chain from the hook)
- Fasten off and leave a long tail for sewing
- Make a tassel with the black yarn and separate the threads with a comb
- Sew the tassel to the tail’s end
- Crochet a ribbon with the pink yarn:
- Make a magic ring (or chain 2) and crochet in it: (3 ch, 2 dc, 3 ch, sl st)*2
- Tighten the magic ring, fasten off and cut the yarn leaving a tail for sewing
- Wrap the yarn around the bow tie a few times and make a knot
- Sew the ribbon to the tail
- Sew the completed tail to the back in round 8
Final Assembly
- Sew the arms to the body in round 25
- Sew the legs to the sides of the body in rounds 6-8, ensuring the toy sits properly by itself
- Check all connections and trim any loose threads
- Congratulations, your smiling donkey is ready!
Personalization Options for Your Amigurumi Donkey
While this pattern creates a charming blue and pink donkey, consider these creative variations:
- Experiment with different color combinations for seasonal themes
- Add accessories like a miniature saddle or hat
- Incorporate embroidered details like stars or hearts
- Scale the pattern up or down by changing hook and yarn size (adjusting stuffing accordingly)

Check this out :Crochet a Colorful Caterpillar Amigurumi
Conclusion
Congratulations on completing your amigurumi donkey! This adorable handcrafted companion showcases your crochet skills and makes a wonderful gift or decorative piece. The combination of blue body, beige face, and pink accent ears creates a distinctive character full of personality.
For crochet enthusiasts who enjoy animal patterns, this donkey project opens the door to creating an entire farmyard collection of amigurumi friends. Consider creating companion pieces like horses, sheep, or farm buildings to expand your handmade menagerie.
Remember to share your creation with fellow crafters to inspire their own amigurumi adventures. Happy crocheting!


Leave a Reply