Table of Contents
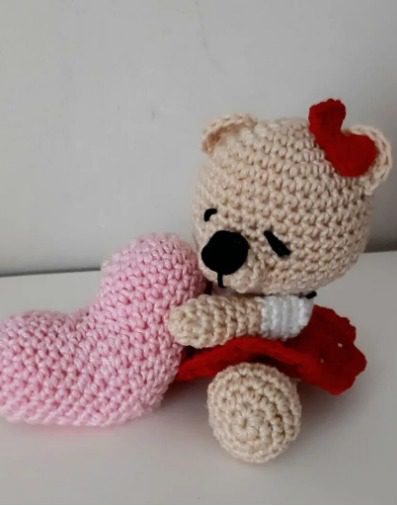
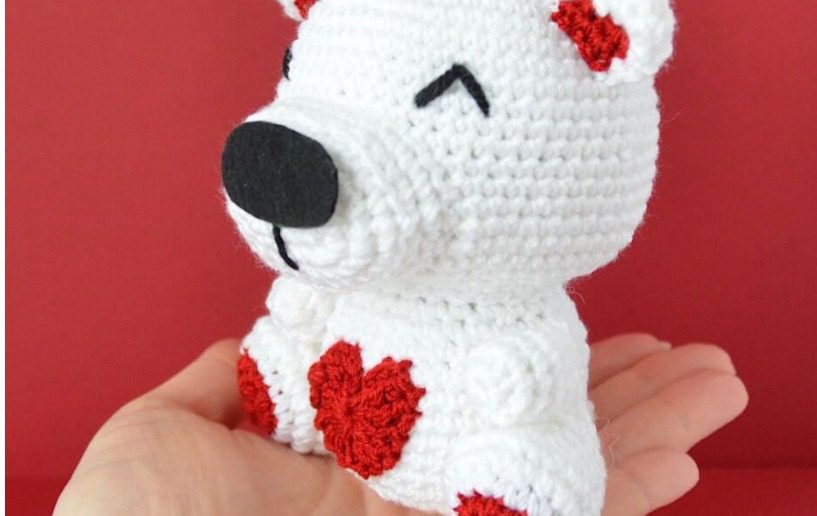
Looking for a charming handmade gift that perfectly captures the spirit of love? This Valentine Bear amigurumi pattern guides you through creating an irresistibly cute teddy bear featuring a sweet heart on its belly. Whether you’re making it as a Bear Amigurumi Valentine’s Day gift, a romantic gesture, or simply a cute decoration, this beginner-friendly crochet pattern produces a lovable plush companion that anyone would cherish.
Introduction to Valentine Bear Amigurumi
Amigurumi, the Japanese art of crocheting small stuffed toys, provides the perfect technique for creating this huggable Valentine Bear. With its rounded features, adorable expression, and signature red heart, this bear makes an ideal handmade gift for someone special or a delightful addition to your seasonal decorations. The pattern uses straightforward techniques, making it accessible even for those new to amigurumi.
Bear Amigurumi Skill Level and Requirements
This pattern is rated as beginner-friendly. To successfully complete this Valentine Bear, you should have basic knowledge of:
- Crocheting in the round
- Basic crochet stitches (single crochet, double crochet, triple crochet)
- Working in back loops only
- Increasing and decreasing
- Simple color changes
- Basic sewing skills for assembly
Bear Amigurumi Materials Needed
Before starting your Valentine Bear project, gather these supplies:
- Medium weight (size 4) cotton yarn in:
- White (for most of the bear)
- Red (for heart, ears, and feet)
- Small amount of black yarn (for embroidery)
- Crochet hook size E/3.25mm
- Black felt (for nose)
- Fiberfill stuffing
- Yarn needle
- Scissors
- Pins (optional, for placing parts before sewing)
Bear Amigurumi Crochet Terminology
This pattern uses standard US crochet terminology:
- MR: Magic ring – creates a tight center for crocheting in the round
- Ch: Chain – the foundation of crochet work
- Sl st: Slip stitch – used to join rounds
- Sc: Single crochet – the main stitch used for most of the bear
- Dc: Double crochet – used for the heart accent
- Tr: Triple crochet – used for the heart accent
- BLO: Back loop only – creates a visible ridge in the design
- Inc: Increase – making two stitches in the same stitch to add width
- Dec: Decrease – combining two stitches into one to reduce width
- F/O: Fasten off – securing and ending your work
Bear Amigurumi Working Style
Unless otherwise specified, this pattern is worked in joined rounds. At the end of each round, join with a slip stitch and chain 1 before beginning the next round.
Bear Amigurumi Head Instructions
Using white yarn:
Round 1: Create a magic ring and work 8 single crochet into it. (8 stitches) Round 2: Increase in each stitch around. (16 stitches) Round 3: Work [1 single crochet, 1 increase] 8 times. (24 stitches) Round 4: Work [2 single crochet, 1 increase] 8 times. (32 stitches) Round 5: Work [3 single crochet, 1 increase] 8 times. (40 stitches) Round 6: Work [4 single crochet, 1 increase] 8 times. (48 stitches) Round 7: Work [5 single crochet, 1 increase] 8 times. (56 stitches) Rounds 8-16: Single crochet in each stitch around. (56 stitches) Round 17: Work [6 single crochet, 1 increase] 8 times. (64 stitches) Round 18: Single crochet in each stitch around. (64 stitches)
Begin stuffing the head at this point.
Round 19: Work [6 single crochet, 1 decrease] 8 times. (56 stitches) Round 20: Work [5 single crochet, 1 decrease] 8 times. (48 stitches) Round 21: Work [2 single crochet, 1 decrease] 12 times. (36 stitches) Round 22: Work [1 single crochet, 1 decrease] 12 times. (24 stitches)
Fasten off and cut the yarn. Complete stuffing the head firmly.
Bear Amigurumi Muzzle Instructions
Using white yarn:
Row 1: Chain 5. Work 2 single crochet in the 2nd chain from hook, 2 single crochet in the next 2 chains, 4 single crochet in the last chain. Continue working on the opposite side of the foundation chain with 2 single crochet, then 1 increase in the last stitch (which already contains 2 single crochet). (12 stitches) Round 2: Work [1 single crochet, 1 increase] 6 times. (18 stitches) Round 3: Work [2 single crochet, 1 increase] 6 times. (24 stitches) Round 4: Single crochet in each stitch around. (24 stitches) Round 5: Working in back loops only, single crochet in each stitch around. (24 stitches) Round 6: Working in both loops, single crochet in each stitch around. (24 stitches)
Fasten off, leaving a long tail for sewing to the head. Position the muzzle on the head between rounds 12-20 and sew it in place. Stuff lightly as you sew.
Bear Amigurumi Facial Features
- Cut an oval-shaped piece of black felt for the nose. Either glue or sew it onto the muzzle.
- Using black yarn, embroider a vertical line below the nose for the mouth.
- Embroider the eyes with black yarn between rounds 9-12 of the head, spacing them approximately 9 stitches apart.
Bear Amigurumi Body Instructions
Using white yarn:
Round 1: Create a magic ring and work 8 single crochet into it. (8 stitches) Round 2: Increase in each stitch around. (16 stitches) Round 3: Work [1 single crochet, 1 increase] 8 times. (24 stitches) Round 4: Work [2 single crochet, 1 increase] 8 times. (32 stitches) Round 5: Single crochet in each stitch around. (32 stitches) Round 6: Work [3 single crochet, 1 increase] 8 times. (40 stitches) Rounds 7-12: Single crochet in each stitch around. (40 stitches) Round 13: Work [3 single crochet, 1 decrease] 8 times. (32 stitches) Round 14: Work [2 single crochet, 1 decrease] 8 times. (24 stitches)
Fasten off, leaving a long tail for attaching to the head. Stuff the body firmly.
Heart Embellishment
Using red yarn:
Working into a magic ring: Chain 3, work 3 triple crochet, 3 double crochet, 1 triple crochet, 3 double crochet, 3 triple crochet, chain 3, and slip stitch into the magic ring.
Pull the tail of yarn tight to close the ring. Use this tail to sew the heart onto the bear’s belly between rounds 5-12 of the body.
Legs Instructions (Make 2)
Starting with red yarn:
Round 1: Create a magic ring and work 6 single crochet into it. (6 stitches) Round 2: Increase in each stitch around. (12 stitches)
Switch to white yarn:
Round 3: Work [1 single crochet, 1 increase] 6 times. (18 stitches) Round 4: Work [2 single crochet, 1 increase] 6 times. (24 stitches) Rounds 5-6: Single crochet in each stitch around. (24 stitches) Round 7: Work [2 single crochet, 1 decrease] 6 times. (18 stitches) Round 8: Work [1 single crochet, 1 decrease] 6 times. (12 stitches) Round 9: Single crochet in each stitch around. (12 stitches) Round 10: Work [1 single crochet, 1 decrease] 4 times. (8 stitches) Round 11: Decrease around. (4 stitches)
Fasten off, leaving a long tail for sewing to the body. Stuff each leg before attaching it to the sides of the body between rounds 6-9.
Ears Instructions (Make 2)
Starting with white yarn:
Round 1: Create a magic ring and work 6 single crochet into it. (6 stitches) Round 2: Increase in each stitch around. (12 stitches) Round 3: 5 single crochet, switch to red yarn for 2 single crochet, switch back to white yarn for 5 single crochet. (12 stitches) Round 4: 4 single crochet in white, 4 single crochet in red, 4 single crochet in white. (12 stitches) Round 5: 4 single crochet in white, 4 single crochet in red, 4 single crochet in white. (12 stitches)
Fasten off, leaving a long tail of white yarn for sewing. Do not stuff the ears; flatten them before attaching to the head between rounds 5-9.
Arms Instructions (Make 2)
Using white yarn:
Round 1: Create a magic ring and work 8 single crochet into it. (8 stitches) Round 2: Work [3 single crochet, 1 increase] 2 times. (10 stitches) Round 3: Single crochet in each stitch around. (10 stitches) Round 4: Work [3 single crochet, 1 decrease] 2 times. (8 stitches) Round 5: Work [2 single crochet, 1 decrease] 2 times. (6 stitches)
Stuff the arm lightly.
Round 6: Flatten the arm and crochet through both layers, work 3 single crochet. (3 stitches)
Fasten off, leaving a long tail for sewing to the sides of the body between rounds 11-13.
Tail Instructions
Using white yarn:
Round 1: Create a magic ring and work 6 single crochet into it. (6 stitches) Round 2: Work [2 single crochet, 1 increase] 2 times. (8 stitches) Round 3: Work [2 single crochet, 1 decrease] 2 times. (6 stitches)
Fasten off, leaving a long tail for sewing to the back of the body between rounds 5-7.
Assembly and Finishing
- Attach the muzzle to the head and add the facial features as described above.
- Sew the head to the body.
- Attach both arms to the sides of the body between rounds 11-13.
- Sew both legs to the bottom sides of the body between rounds 6-9.
- Attach the ears to the top of the head between rounds 5-9.
- Sew the tail to the back of the body between rounds 5-7.
- Make sure the heart is securely attached to the center of the belly between rounds 5-12.
- Double-check all connections and trim any remaining yarn ends.
Customization Ideas
Make your Valentine Bear unique with these creative variations:
- Add a small bow tie or ribbon for extra cuteness
- Change the heart color to pink or another favorite color
- Embroider small hearts on the paws or ears
- Add a personalized message or date embroidered on the back
- Create a companion bear with different color accents
- Make a miniature version by using lighter weight yarn and a smaller hook
- Add scented stuffing like lavender for a pleasant aroma
Troubleshooting Common Issues
- If your bear is having trouble sitting upright, try adding extra stuffing to the bottom of the body or legs
- For a more defined heart shape, lightly block the heart embellishment before attaching
- If the face looks uneven, use pins to position the eyes accurately before embroidering
- To prevent stuffing from showing through, use slightly tighter stitches or a hook one size smaller
- If the bear seems floppy, add more fiberfill or consider using a firmer stuffing alternative
Care Instructions
To keep your Valentine Bear looking its best:
- Spot clean with mild soap and cold water
- Air dry only, never machine wash or dry
- Brush gently with a soft toothbrush to restore fluffiness if needed
- Store in a clean, dry place away from direct sunlight
- For delicate embroidery details, avoid rubbing the face area when cleaning

Check this out :Baby Yoda Amigurumi Crochet Pattern
Conclusion
Your Valentine Bear amigurumi is now complete and ready to spread some love! This huggable creation makes a thoughtful handmade gift that’s perfect for Valentine’s Day, anniversaries, or any occasion where you want to show someone you care. The combination of soft textures, adorable features, and the sweet heart embellishment creates a charming keepsake that’s sure to be treasured.
Whether you’re making this bear for yourself or as a gift for someone special, your handcrafted Valentine Bear represents the time, effort, and love you’ve put into creating something truly unique. Happy crocheting!


Leave a Reply