Table of Contents
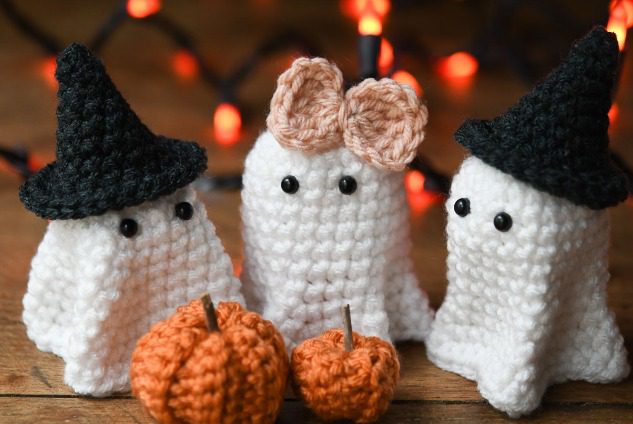
Halloween crafting season is here, and nothing says “spooky but sweet” quite like these adorable cutie ghost crochet patterns. Perfect for beginners and experienced crocheters alike, these tiny ghosties stand just 3 inches tall and make charming decorations for your Halloween home décor. In this comprehensive guide, we’ll walk you through creating three different ghost variations, complete with adorable accessories like witch hats, mini pumpkins, and bows.
Why Cutie Ghost Crochet Projects Are Perfect for Halloween
Cutie ghost crochet patterns offer the perfect balance of spooky and adorable. Unlike store-bought decorations, these handmade ghosties add a personal touch to your Halloween décor. The unstuffed design makes them quick to work up, while their small size means you can create an entire ghost family in just one evening.
These ghost patterns use simple stitches that beginners can master, making them an excellent first Halloween crochet project. More experienced crocheters will appreciate how quickly they come together and how versatile they are for decoration.
Essential Supplies for Cutie Ghost Crochet Patterns
Before starting your cutie ghost crochet project, gather these materials:
- 4.0 mm crochet hook
- 6 mm safety eyes
- Worsted weight (#4) yarn in:
- White (Antique White – “I Love This Yarn” recommended)
- Black or Charcoal (Dark Heather Gray – Yarn Bee Soft & Sleek)
- Orange (Desert Glaze – “I Love This Yarn”)
- Pink (Soft Shell – Yarn ID)
- Scissors
- Tapestry needle
- Polyfil stuffing (for the mini pumpkins only)
Key Stitches and Techniques for Ghost Crochet Patterns
To create these adorable ghost crochet patterns, you’ll need to know these basic stitches:
- SC – single crochet
- Inc – increase (two single crochets in one stitch)
- Tr – treble crochet
- Sl st – slip stitch
- SC in BLO – single crochet in back loop only
- Invisible fasten off technique
For tighter, neater stitches, try using the Yarn Under/Yarn Over method: Insert your hook into the stitch, yarn UNDER and pull up a loop, yarn OVER and pull through both loops.
Cutie Ghost Crochet Pattern #1: The Classic Ghost with Witch Hat
This classic ghost design features a rounded head and flared bottom that creates the perfect ghost silhouette:
Round 1: In a Magic Ring, SC 6 Round 2: Inc in each stitch (12 stitches) Round 3: (SC 1, inc) x6 (18) Round 4: (SC 2, inc) x6 (24) Round 5, 6: SC around (24) Round 7: (SC 5, inc) x4 (28) Round 8: (SC 6, inc) x4 (32) Round 9: (SC 7, inc) x4 (36) Round 10-12: SC around (36) Round 13: SC 1, Sl st in next 2 stitches, invisible fasten off and weave in ends.
Attach the eyes between Rows 4 and 5, about 2-3 stitches apart. To create the ghost’s distinctive shape, gently pinch the areas along the increases.
check out this pattern as well : Crochet Daphne the Duck
Cutie Ghost Crochet Pattern #2: The Bow Ghost
This slightly shorter ghost design is perfect for adding a cute bow:
Round 1: In a Magic Ring, SC 6 Round 2: Inc in each stitch (12 stitches) Round 3: (SC 1, inc) x6 (18) Round 4: (SC 2, inc) x6 (24) Round 5-11: SC around (24) Round 12: (SC 3, inc) x6 (30) Round 13: (SC 4, inc) x6 (36) Round 14: (SC 5, inc) x6 (42) Round 15: SC 1, Sl st in next 2 stitches, invisible fasten off and weave in ends.
Position the eyes between Rows 5 and 6, about 2-3 stitches apart. Gently pinch along the increase areas to create the ghost’s shape.
Cutie Ghost Crochet Pattern #3: The Taller Ghost
This taller ghost variation creates a more elegant silhouette:
Round 1: In a Magic Ring, SC 6 Round 2: Inc in each stitch (12 stitches) Round 3: (SC 1, inc) x6 (18) Round 4: (SC 2, inc) x6 (24) Round 5-11: SC around (24) Round 12: (SC 5, inc) x4 (28) Round 13: (SC 6, inc) x4 (32) Round 14: (SC 7, inc) x4 (36) Round 15: SC 1, Sl st in next 2 stitches, invisible fasten off and weave in ends.
Attach eyes between rows 5 and 6, spaced about 2-3 stitches apart. Create definition by pinching along the increases.
Adorable Accessories for Your Cutie Ghost Crochet Projects
Mini Pumpkin Pattern
For the mini pumpkins, follow a simple pumpkin pattern with these modifications:
- For the smallest pumpkin, chain 6
- For the larger pumpkin, chain 9
Cutie Ghost Bow Pattern
In a magic ring:
- (Ch-4, 3 Tr, Ch-4) and Sl st into ring
- Again, (Ch-4, 3 Tr, Ch-4) Sl st into ring and fasten off
- Thread the end tail through the center of the magic ring to the back
- Tighten the magic ring to close
- Take both tails and wrap them around the center in opposite directions
- Cinch tightly before knotting
- Attach to your ghost by threading the tails between rows 1-2 and 2-3
Witch Hat Pattern for Ghost Crochet
Round 1: In a Magic Ring, SC 4 Round 2: (SC 1, inc) x2 (6 stitches) Round 3: (SC 2, inc) x2 (8) Round 4: (SC 3, inc) x2, (10) Round 5: (SC 4, inc) x2, (12) Round 6: (SC 5, inc) x2, (14) Round 7: (SC 6, inc) x2 (16) Round 8: (SC 7, inc) x2 (18) Round 9: (SC1, inc) x9, (27) Round 10: SC 1, Sl st in next 2 stitches, invisible fasten off and weave in ends.
The hat can simply sit on top of your ghost or be secured with a few stitches or fabric glue.
Creative Ways to Display Your Cutie Ghost Crochet Decorations
Once you’ve created your trio of adorable ghost crochet decorations, here are some creative ways to display them:
- Arrange them on a mantel with mini pumpkins and fall foliage
- Create a ghost mobile by hanging them from a small branch
- Add them to a Halloween wreath
- Place them in a Halloween-themed shadow box
- Use them as cute tabletop decorations for a Halloween party
- Arrange them on a bookshelf among your fall reading collection
- Add a string to display them as ornaments
Customizing Your Cutie Ghost Crochet Patterns
While the original patterns use white yarn for a classic ghost appearance, don’t be afraid to get creative:
- Try glow-in-the-dark yarn for an extra spooky effect
- Use pastel colors for a “friendly ghost” collection
- Add embroidered details like rosy cheeks or different expressions
- Create themed ghosts with tiny accessories like scarves, flowers, or candy corn
- Scale the pattern up or down by changing your hook and yarn weight
Caring for Your Cutie Ghost Crochet Decorations
To ensure your ghost crochet decorations last for many Halloween seasons:
- Store them in a sealed container with a silica gel packet when not in use
- Keep them away from moisture and direct sunlight when displayed
- Gently spot clean if needed
- Reshape them carefully at the beginning of each season
Why These Cutie Ghost Crochet Patterns Are Perfect for Beginners
These ghost crochet patterns are ideal for beginners because:
- They use basic stitches (primarily single crochet)
- The continuous spiral technique means less joining and chaining
- The small size means quick completion and satisfaction
- Mistakes are easily hidden in the overall ghost shape
- The patterns build skills that transfer to other amigurumi projects
Conclusion: Create Your Own Ghostly Trio
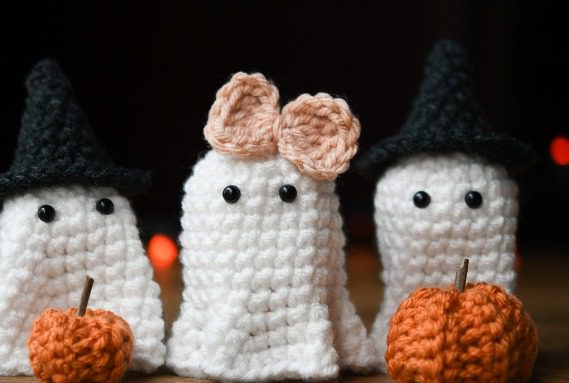
Whether you’re new to crochet or an experienced crafter, these cutie ghost crochet patterns offer a delightful way to celebrate Halloween with handmade charm. The trio of ghosts creates a coordinated display that’s both adorable and seasonally appropriate. Best of all, these quick projects can be completed in time for this year’s Halloween celebrations, even if you’re starting in October!
Remember that these decorative ghosties aren’t toys but rather charming additions to your Halloween decor. Happy crocheting, and enjoy creating your own haunted trio of cutie ghost crochet decorations!




Leave a Reply