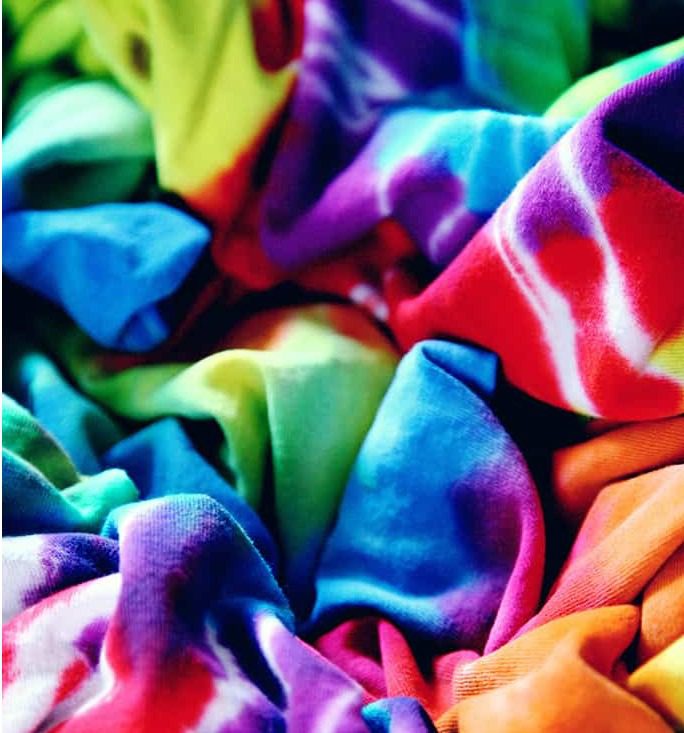
Tie dye is a fun, creative craft that transforms plain white fabric into vibrant, colorful works of art. Learning how to tie dye opens up endless possibilities for personalizing clothing and home textiles with unique patterns that are impossible to replicate exactly. This comprehensive guide will walk you through everything you need to know about creating beautiful tie dye projects, from selecting the right materials to mastering various folding techniques and caring for your finished creations.
Understanding Tie Dye
Tie dye is a resist-dyeing technique where you fold, twist, or crumple fabric and bind it with string or rubber bands before applying dye. The bindings prevent dye from reaching certain areas of the fabric, creating distinctive patterns when the fabric is unfolded. This ancient technique has been practiced across cultures for centuries but gained mainstream popularity in America during the 1960s and 1970s as a symbol of counterculture and self-expression.
Today, tie dye continues to cycle in and out of fashion trends, but the craft itself remains a beloved activity for people of all ages. The satisfaction of creating something uniquely yours, combined with the element of surprise when revealing the final pattern, makes tie dye an engaging project for beginners and experienced crafters alike.
Essential Supplies for Tie Dye Projects
Gathering the right supplies before you begin will ensure your tie dye project turns out vibrant and long-lasting. Here’s what you’ll need:
Dyes
The most important supply is, of course, the dye itself. For best results, use fiber-reactive dyes specifically formulated for tie dyeing:
- Procion MX dyes – Professional-grade dyes that create vibrant, colorfast results. These require a soda ash pre-treatment.
- Tulip One-Step dyes – Consumer-friendly kits with pre-measured dye powder and soda ash combined. Just add water and shake.
Avoid using all-purpose dyes like Rit or Dylon for traditional tie dye projects, as they typically produce paler colors that may fade quickly.
Fabric Items
Choose items made primarily from natural fibers:
- 100% cotton – The ideal fabric for tie dye projects
- Cotton blends – Look for at least 80% cotton content
- Rayon – Takes dye well but may require gentler handling
- Linen – Another natural fiber that accepts dye nicely
Popular items to tie dye include:
- T-shirts
- Sweatshirts and hoodies
- Socks
- Tote bags
- Pillowcases
- Baby onesies
- Canvas shoes
Additional Supplies
- Soda ash (sodium carbonate) – Required pre-soak for Procion dyes
- Rubber bands – Used to bind fabric and create patterns
- Squeeze bottles – For precise dye application
- Plastic gloves – Protect hands from staining
- Dust mask – Wear when mixing powdered dye or soda ash
- Plastic drop cloths or trash bags – Protect work surfaces
- Wire rack – Elevates projects off work surfaces during dyeing
- Zip-top plastic bags or plastic wrap – To keep projects damp during processing
- Synthrapol or similar detergent – Specialized detergent that helps remove unfixed dye
Preparing for Your Tie Dye Project
Proper preparation is crucial for achieving vibrant, long-lasting tie dye results. Follow these steps before applying any dye:
Setting Up Your Workspace
- Choose a well-ventilated area, preferably outdoors or in a utility room with easy-to-clean surfaces.
- Cover your work area with plastic drop cloths or large trash bags.
- Have paper towels or rags nearby for quick cleanup of spills.
- Fill squeeze bottles with water before adding dye powder to avoid airborne particles.
- Wear clothes you don’t mind staining or an apron to protect your clothing.
Preparing Your Fabric
- Pre-wash all items with Synthrapol or regular detergent to remove any manufacturing oils, dirt, or sizing that might resist dye.
- For Procion MX dyes: Mix 1 cup of soda ash with 1 gallon of warm water. Soak fabric items in this solution for 15-20 minutes. Wring out excess solution so fabric is damp but not dripping.
- For Tulip One-Step dyes: Skip the soda ash soak, as it’s already included in the dye powder.
Mixing Your Dyes
For Tulip One-Step dyes:
- Fill the provided bottles with water to the indicated line.
- Secure the cap and shake vigorously until completely dissolved.
For Procion MX dyes:
- Put on your dust mask and gloves.
- Add 4 teaspoons of dye powder to a small amount of warm water to create a paste.
- Add 1 cup of water and stir well to dissolve completely.
- Transfer to squeeze bottles for easy application.
Popular Tie Dye Folding Techniques
The way you fold and bind your fabric determines the pattern that emerges. Here are several classic techniques to try:
Spiral (Swirl) Pattern
This creates the classic spiral pattern that many people associate with tie dye:
- Lay the shirt flat on your work surface.
- Decide where you want the center of the spiral (middle of the shirt, off-center, etc.).
- Pinch the fabric at that point.
- Twist the fabric clockwise, continuing until the entire shirt is twisted into a flat disk.
- Secure with rubber bands, dividing the disk into 6-8 pie-like sections.
- Apply different colors to each section for a rainbow effect, or use varying shades of one color for an ombre look.
Bullseye Pattern
This technique creates concentric circles:
- Pinch the fabric where you want the center of the bullseye.
- Pull the fabric up into a cone shape.
- Starting about an inch from the tip, wrap rubber bands around the fabric at regular intervals.
- Apply different colors between each set of rubber bands.
Crumple (Nebula) Technique
This creates a random, mottled pattern with lots of small details:
- Lay the fabric flat.
- Scrunch and crumple the fabric randomly, gathering it into a compact ball.
- Secure with rubber bands in several places.
- Apply different colors to various sections of the crumpled fabric.
Stripe Pattern
Create linear patterns with this technique:
- Lay the fabric flat.
- Accordion-fold the fabric in even pleats, either horizontally or vertically.
- Secure with rubber bands spaced evenly along the folded strip.
- Apply different colors between the rubber bands for rainbow stripes, or use one color for a simpler look.
Sunburst Pattern
Create multiple small bullseye designs:
- Lay the fabric flat.
- Pinch small sections of fabric and pull them up into points.
- Secure each pinched section with rubber bands.
- Apply dye to the fabric, with different colors around each pinched point.
Applying the Dye
Once your fabric is folded and secured, it’s time to apply the dye:
Using Squeeze Bottles
- Apply dye directly to the fabric by squeezing the bottles.
- Be generous with dye application—saturate the fabric thoroughly.
- Flip the bound fabric over and apply dye to the other side as well.
- Consider color placement—complementary colors (like blue and orange) may create brown where they meet.
Dip Dyeing Method
For some patterns, you might dip sections into dye-filled containers:
- Fill separate containers with different colors of dye.
- Dip portions of your bound fabric into the dye buckets.
- Hold the fabric in the dye for 30 seconds to several minutes, depending on desired intensity.
- Allow excess dye to drip back into the container before moving to another color.
Processing Your Tie Dye
After applying dye, proper processing ensures the colors set permanently:
- Place the dyed fabric in a plastic bag or wrap it in plastic wrap to keep it damp.
- Put the wrapped fabric in a warm location (75-85°F is ideal).
- Allow the dye to process for 6-24 hours. Longer processing time results in more vibrant colors.
- For Procion MX dyes, 24 hours is recommended for maximum color fastness.
- For Tulip One-Step dyes, 6-8 hours is usually sufficient.
Quick-Set Microwave Method (Optional)
If you’re short on time, you can accelerate the setting process:
- Place your dyed and plastic-wrapped fabric in a microwave-safe zip-top bag.
- Microwave for 1-2 minutes, watching carefully.
- Stop if the bag inflates significantly with steam.
- Allow to cool completely before rinsing.
Note: This method should only be used with adult supervision and extreme caution.
Rinsing and Washing Your Tie Dye
The final steps are crucial for preserving your design and preventing colors from bleeding:
Initial Rinse
- Keep rubber bands in place for the first rinse.
- Rinse under cold running water until the water begins to run clearer.
- Remove rubber bands and continue rinsing in progressively warmer water.
- Keep rinsing until water runs relatively clear.
First Wash
- Wash your tie dyed items in the washing machine on a hot water cycle.
- Use Synthrapol or another color-safe detergent.
- Wash similar colored items together initially.
- Do not overload the washing machine—give the items room to move freely.
Subsequent Care
- Wash tie dyed items separately for the first 2-3 washes.
- After that, they can usually be washed with similar colors.
- To maintain vibrancy, wash in cold water and avoid harsh detergents.
- Line drying will help preserve colors longer than machine drying.
Troubleshooting Common Tie Dye Issues
Even experienced tie dyers encounter problems occasionally. Here are solutions to common issues:
Pale or Faded Colors
Possible causes:
- Insufficient dye concentration
- Not enough processing time
- Using the wrong type of dye
- Using fabric with low natural fiber content
Solutions:
- Use the recommended amount of dye powder
- Allow full processing time (24 hours for best results)
- Use fiber-reactive dyes specifically for tie dye
- Choose 100% cotton or high cotton-content fabrics
Bleeding Colors and Muddy Designs
Possible causes:
- Complementary colors mixing
- Insufficient binding
- Excessive moisture during dyeing
Solutions:
- Plan color placement carefully
- Secure bindings tightly
- Remove excess moisture before dyeing
- Rinse thoroughly before washing
Dye Not Penetrating Folds
Possible causes:
- Fabric folded too tightly
- Not enough dye applied
- Fabric too dry during dyeing
Solutions:
- Create looser folds
- Apply dye generously
- Ensure fabric is damp but not soaking wet
Variations on Traditional Tie Dye
Once you’ve mastered basic tie dye, try these variations:
Ice Dyeing
- Fold and bind fabric as normal
- Place bound fabric on a rack over a container
- Cover completely with ice cubes
- Sprinkle powdered dye directly onto the ice
- Let ice melt naturally, creating unique patterns as dye dissolves
Reverse Tie Dye (Bleach Tie Dye)
- Start with dark-colored cotton garments
- Fold and bind as normal
- Apply diluted bleach solution (1 part bleach to 1 part water) instead of dye
- Neutralize with hydrogen peroxide solution when design reaches desired lightness
- Rinse thoroughly and wash
Shibori Techniques
These Japanese resist-dyeing methods create more structured patterns:
- Itajime (fold and clamp): Fold fabric in geometric patterns and clamp between shapes
- Arashi (pole wrapping): Wrap fabric around a pole and scrunch it down
- Kumo (binding): Bind small sections of fabric to create spider-like patterns
Advanced Tie Dye Tips
Take your tie dye to the next level with these professional tips:
Color Theory in Tie Dye
- Primary colors (red, yellow, blue) can be applied side by side to create secondary colors where they overlap
- Analogous colors (next to each other on the color wheel) blend harmoniously
- Complementary colors (opposite on the color wheel) may create brown where they meet
- Monochromatic schemes using various shades of one color create sophisticated looks
Creating Precise Patterns
- Use washable markers to draw guidelines on fabric before folding
- Try using shaped objects like marbles or coins secured within folds
- Experiment with stitching patterns into fabric before dyeing (traditional shibori method)
- Use clamps, clothespins, or binder clips as binding alternatives
Custom Color Mixing
- Create unique colors by mixing dye powders before adding water
- Adjust dye concentration for pastel versus vibrant colors
- Layer colors by applying one color, letting it partially set, then applying another
Tie Dye for Special Occasions and Groups
Tie dye makes a great activity for parties, camps, and other group settings:
Planning a Tie Dye Party
- Pre-wash all garments
- Pre-mix dyes in labeled bottles
- Set up stations for folding, dyeing, and bagging
- Provide written or visual instructions for different patterns
- Have participants write their names on plastic bags for their items
- Consider having participants take projects home to process, rinse, and wash
Tie Dye for Kids
- Choose washable, non-toxic dyes
- Pre-bind garments for very young children
- Focus on simpler patterns like spirals and crumples
- Have plenty of adult supervision
- Use smaller garments that require less dye
Conclusion
Learning how to tie dye opens up a world of creative possibilities. The combination of science and art creates a uniquely satisfying craft experience, and the personalized results mean no two projects are ever exactly alike. Whether you’re creating a single special garment or planning a tie dye party for dozens, the fundamentals remain the same: quality materials, careful preparation, creative folding, and proper processing.
Remember that tie dye, like any craft, improves with practice. Don’t be discouraged if your first attempts don’t turn out exactly as planned—unexpected results are part of the tie dye journey and often lead to happy accidents and new techniques to explore. The most important part is enjoying the creative process and expressing yourself through color and pattern.
With the techniques and troubleshooting tips in this guide, you have everything you need to create beautiful, vibrant tie dye projects that will bring color and joy to your wardrobe and home.


Leave a Reply