Table of Contents
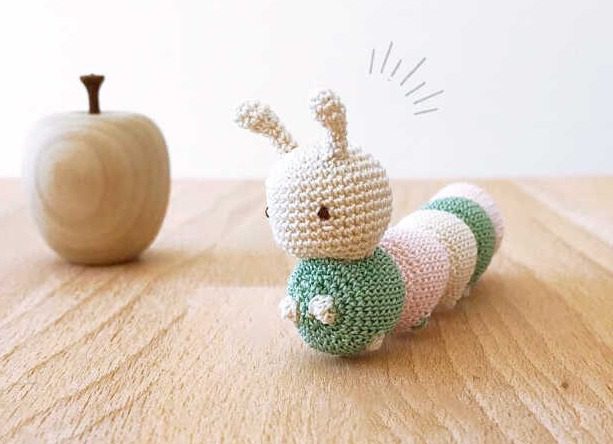
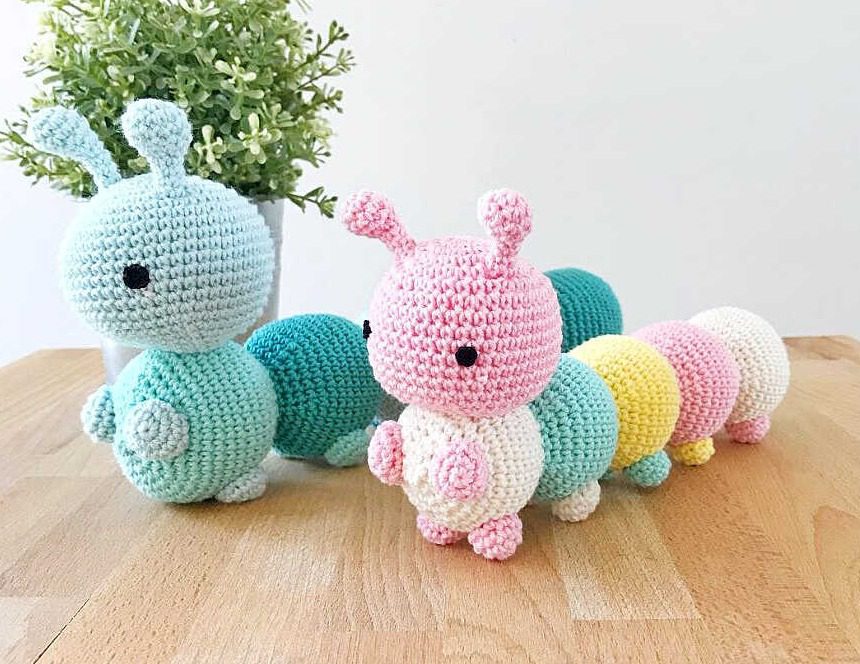
Creating your own handmade caterpillar amigurumi is a delightful project perfect for crocheters of all skill levels. This Caterpillar Amigurumi comprehensive guide will walk you through crafting an adorable multicolored caterpillar that measures approximately 22 cm long (8.7 inches) and 12.5 cm tall (5 inches). With its bright colors and charming design, this caterpillar makes a perfect gift for children or a wonderful addition to your amigurumi collection.
Essential Materials for Your Caterpillar Amigurumi
Before beginning your colorful caterpillar project, gather these supplies:
- 4-ply cotton yarn in cream, pink, ice green, and yellow
- Strand of pale pink yarn for the cheeks
- Lace yarn (preferably black) for the eyes
- 2.5 mm crochet hook for the main body
- 1.0 mm crochet hook for the eyes
- Fiberfill stuffing
- Yarn needle for assembly
- Sewing needle for detailed work
- Scissors
Understanding Caterpillar Amigurumi Terminology
Familiarize yourself with these crochet abbreviations used throughout the pattern:
- st(s) – stitch(es)
- ch – chain
- sc – single crochet
- inc – increase (2 single crochets in one stitch)
- dec – decrease (2 single crochets worked together)
- (…) – repeat the instructions within the brackets the specified number of times
- […] – total number of stitches at the end of the round
Detailed Caterpillar Amigurumi Pattern Instructions
Caterpillar Amigurumi Creating the Segmented Body
The caterpillar’s body consists of colorful segments worked in sequence. You’ll begin with cream and alternate through different colors:
Caterpillar Amigurumi First Segment (Cream)
- Round 1: Create 6 single crochets in a magic ring [6 stitches]
- Round 2: Increase in each stitch around [12 stitches]
- Round 3: Work pattern of 1 single crochet followed by an increase, repeated 6 times [18 stitches]
- Round 4: Work pattern of an increase followed by 2 single crochets, repeated 6 times [24 stitches]
- Round 5: Work pattern of 3 single crochets followed by an increase, repeated 6 times [30 stitches]
- Round 6: Work 2 single crochets, increase, then work pattern of 4 single crochets followed by an increase repeated 5 times, finish with 2 single crochets [36 stitches]
- Rounds 7-12: Work 36 single crochets for six consecutive rounds [36 stitches]
- Round 13: Work pattern of a decrease followed by 4 single crochets, repeated 6 times [30 stitches]
- Round 14: Work pattern of a decrease followed by 3 single crochets, repeated 6 times [24 stitches]
- Round 15: Work pattern of a decrease followed by 2 single crochets, repeated 6 times [18 stitches]
- Fasten off the cream yarn
- Begin adding fiberfill stuffing as you continue
Second Segment (Pink)
- Round 16: Join pink yarn and work pattern of an increase followed by 2 single crochets, repeated 6 times [24 stitches]
- Round 17: Work pattern of 3 single crochets followed by an increase, repeated 6 times [30 stitches]
- Round 18: Work pattern of an increase followed by 4 single crochets, repeated 6 times [36 stitches]
- Rounds 19-24: Work 36 single crochets for six consecutive rounds [36 stitches]
- Round 25: Work pattern of a decrease followed by 4 single crochets, repeated 6 times [30 stitches]
- Round 26: Work pattern of a decrease followed by 3 single crochets, repeated 6 times [24 stitches]
- Round 27: Work pattern of a decrease followed by 2 single crochets, repeated 6 times [18 stitches]
- Fasten off the pink yarn
Third and Fourth Segments (Yellow and Ice Green)
- Repeat Rounds 16-27 using yellow yarn for the third segment
- Repeat Rounds 16-27 using ice green yarn for the fourth segment
Final Segment (Cream)
- Return to cream yarn and repeat Rounds 16-27
- Continue with: Work pattern of a decrease followed by a single crochet, repeated 6 times [12 stitches]
- Work 6 decreases [6 stitches]
- Fasten off, leaving a tail for closing
- Sew the opening closed and weave in the yarn end
Crafting the Head
The caterpillar’s expressive head is made with pink yarn:
- Round 1: Create 6 single crochets in a magic ring [6 stitches]
- Round 2: Increase in each stitch around [12 stitches]
- Round 3: Work pattern of 1 single crochet followed by an increase, repeated 6 times [18 stitches]
- Round 4: Work pattern of an increase followed by 2 single crochets, repeated 6 times [24 stitches]
- Round 5: Work pattern of 3 single crochets followed by an increase, repeated 6 times [30 stitches]
- Round 6: Work 2 single crochets, increase, then work pattern of 4 single crochets followed by an increase repeated 5 times, finish with 2 single crochets [36 stitches]
- Round 7: Work pattern of an increase followed by 5 single crochets, repeated 6 times [42 stitches]
- Rounds 8-14: Work 42 single crochets for seven consecutive rounds [42 stitches]
- Round 15: Work pattern of a decrease followed by 5 single crochets, repeated 6 times [36 stitches]
- Round 16: Work pattern of a decrease followed by 4 single crochets, repeated 6 times [30 stitches]
- Round 17: Work pattern of a decrease followed by 3 single crochets, repeated 6 times [24 stitches]
- Round 18: Work pattern of a decrease followed by 2 single crochets, repeated 6 times [18 stitches]
- Fasten off, leaving a long tail for sewing to the body
- Stuff the head with fiberfill
Creating the Antennae
Make two identical antennae:
- Round 1: Using your choice of color, create 5 single crochets in a magic ring [5 stitches]
- Round 2: Increase in each stitch around [10 stitches]
- Rounds 3-4: Work 10 single crochets for two consecutive rounds [10 stitches]
- Round 5: Work 5 decreases [5 stitches]
- Rounds 6-8: Work 5 single crochets for three consecutive rounds [5 stitches]
- Fasten off, leaving a long tail for sewing to the head
- No stuffing is required for the antennae
Forming the Legs
The caterpillar needs twelve legs total:
- Round 1: Using your choice of color(s), create 5 single crochets in a magic ring [5 stitches]
- Round 2: Increase in each stitch around [10 stitches]
- Rounds 3-4: Work 10 single crochets for two consecutive rounds [10 stitches]
- Fasten off, leaving a long tail for sewing to the body
- No stuffing is needed for the legs
- Repeat to make 12 legs total
Creating the Eyes
Make two identical eyes:
- Using black lace yarn and the 1.0 mm hook, create 6 single crochets in a magic ring [6 stitches]
- Fasten off, leaving a long tail for sewing to the head
Assembling Your Caterpillar Amigurumi
Follow these steps to bring your caterpillar to life:
Step 1: Attach the Antennae
- Using your yarn needle, sew the antennae to the top of the head
- Weave in the ends and hide the yarn tails
Step 2: Add the Facial Features
- With the sewing needle, sew the eyes onto the front of the head
- Weave in the ends and hide the yarn tails
- Using a strand of pale pink yarn, stitch small circles below the eyes to create rosy cheeks
Step 3: Attach the Legs
- Using your yarn needle, sew the legs onto the body
- Place two legs on each colored segment
- Add an additional two legs at the front of the body
- Weave in all ends and hide the yarn tails
Step 4: Join the Head and Body
- With your yarn needle, securely sew the head to the front of the body
- Weave in the ends and hide the yarn tail
Congratulations! Your colorful caterpillar amigurumi is now complete. This charming creature makes a wonderful handmade gift or a delightful addition to your own collection. The simple pattern and vibrant design ensure your creation will bring joy to anyone who sees it.

Check this out :Crochet Your Own Adorable Bat Amigurumi Pattern
Explore More Amigurumi Projects
After mastering this caterpillar pattern, you might enjoy creating other amigurumi animals such as cats, dolls, dogs, unicorns, lambs, dinosaurs, foxes, bears, giraffes, pigs, penguins, pandas, llamas, bunnies, elephants, hippos, and monkeys. Each project will help you develop your crochet skills while creating an adorable collection of handmade toys.
Remember that each amigurumi creation will have its own unique personality, making it truly one-of-a-kind. Happy crocheting!


Leave a Reply