Table of Contents
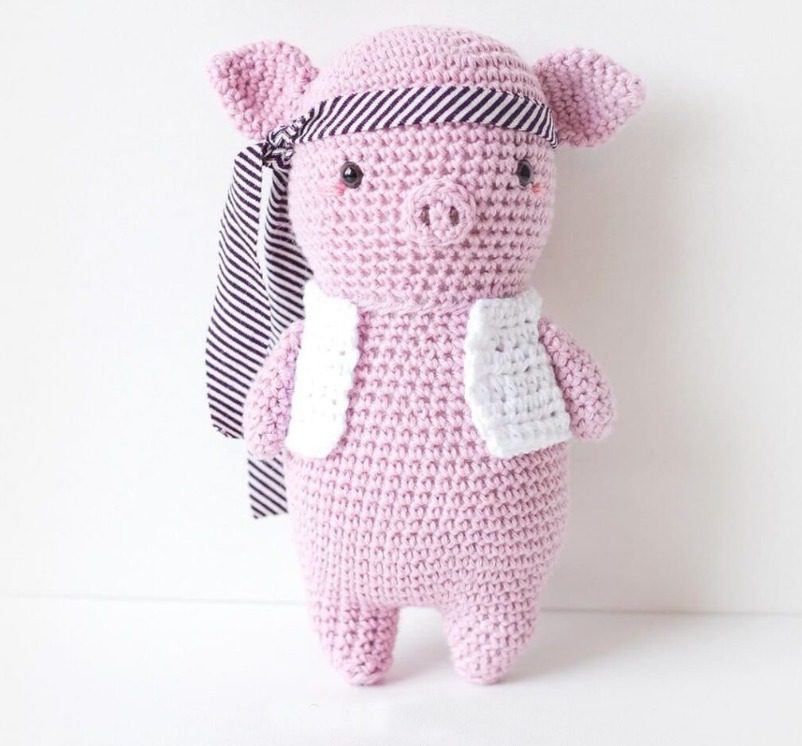
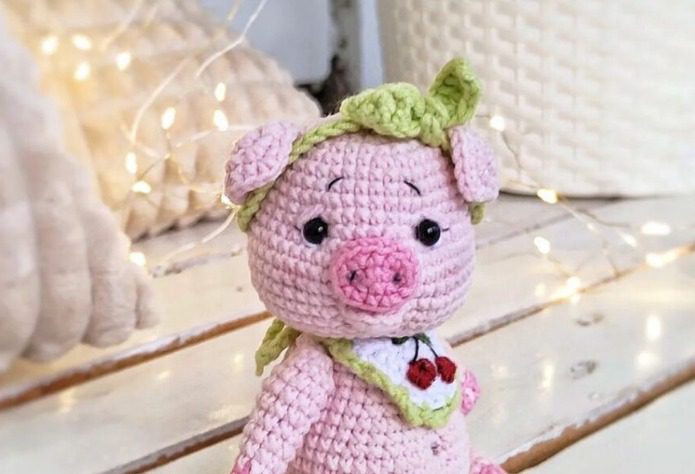
Create Piglet Amigurumi your own adorable piglet amigurumi with this comprehensive pattern guide. Dotti the Piglet features sweet details like decorative flowers, charming eyebrows, and even removable trousers! This advanced-level pattern results in a huggable, characterful companion that’s perfect for gifting or adding to your handmade collection. Follow along as we walk through each step of creating this delightful crochet piglet.
Materials Needed for Dotti the Piglet Amigurumi
Before beginning your Piglet Amigurumi journey, gather these supplies:
- 3.5 mm crochet hook
- Rainbow Cotton 8/8 yarn in:
- Almond (#089) – 2 skeins (for the body, head, ears, tail, legs, and snout)
- Rose (#044) – 1 skein (for the trousers and large flower)
- Small amounts of:
- Rainbow Lace or another black lace yarn (for eyebrows)
- Yellow yarn (for medium flower)
- Blue yarn (for small flower)
- White yarn (for eye detail)
- 6 mm safety eyes
- One 15 mm button
- Polyester toy stuffing
- Tapestry needle for assembly
Understanding Piglet Amigurumi Terminology
For those new to amigurumi patterns, here’s a guide to the abbreviations used:
- Sc: Single crochet – the basic stitch used throughout the pattern
- Sl st: Slip stitch – used for joining and creating smooth edges
- Mr: Magic ring – the technique used to start crocheting in the round with no hole
- Inc: Increase – making two single crochets in the same stitch
- Dec: Decrease – working two stitches together to reduce count
- Rnd: Round – indicates a complete circuit around your work
- Ch: Chain stitch – the foundation of many crochet techniques
- Numbers in parentheses at the end of rounds show the total stitch count
Piglet Amigurumi Pro Tips for Perfect Results
For the best possible Dotti the Piglet:
- Stuff the head and body firmly to maintain shape and prevent sagging
- Work your stitches as tightly as possible to avoid gaps between stitches
- Use stitch markers to track your rounds, especially in the body section
- Take your time with the facial features for the most expressive result
Piglet Amigurumi Creating the Head and Body
The head and body are worked as one continuous piece, creating a seamless look. Using Almond yarn:
Round 1: Create 6 single crochets in a magic ring [6 stitches total] Round 2: Increase in each stitch around [12 stitches total] Round 3: Work (1 single crochet, increase) 6 times around [18 stitches total] Round 4: Work (2 single crochets, increase) 6 times around [24 stitches total] Round 5: Work (3 single crochets, increase) 6 times around [30 stitches total] Round 6: Work (4 single crochets, increase) 6 times around [36 stitches total] Round 7: Work (5 single crochets, increase) 6 times around [42 stitches total] Round 8: Work (6 single crochets, increase) 6 times around [48 stitches total] Round 9: Work (7 single crochets, increase) 6 times around [54 stitches total] Rounds 10-18: Work 1 single crochet in each stitch for 9 rounds [54 stitches remain]
At this point, attach the safety eyes between rounds 13 and 14, with 7 single crochets between them. Using white yarn, embroider a small edge around each eye to create a distinctive look. Begin stuffing the head firmly.
Round 19: Work (7 single crochets, decrease) 6 times around [48 stitches total] Round 20: Work (6 single crochets, decrease) 6 times around [42 stitches total] Round 21: Work (5 single crochets, decrease) 6 times around [36 stitches total] Round 22: Work (4 single crochets, decrease) 6 times around [30 stitches total] Round 23: Work (3 single crochets, decrease) 6 times around [24 stitches total] Round 24: Work (2 single crochets, decrease) 6 times around [18 stitches total] Rounds 25-27: Work 1 single crochet in each stitch for 3 rounds [18 stitches remain]
Now the neck is formed, and we’ll expand for the body:
Round 28: Work (2 single crochets, increase) 6 times around [24 stitches total] Round 29: Work (3 single crochets, increase) 6 times around [30 stitches total] Round 30: Work (4 single crochets, increase) 6 times around [36 stitches total] Rounds 31-43: Work 1 single crochet in each stitch for 13 rounds [36 stitches remain]
Continue stuffing the body firmly as you work. Now we’ll begin decreasing to form the bottom:
Round 44: Work (4 single crochets, decrease) 6 times around [30 stitches total] Round 45: Work (3 single crochets, decrease) 6 times around [24 stitches total] Round 46: Work (2 single crochets, decrease) 6 times around [18 stitches total] Round 47: Work (1 single crochet, decrease) 6 times around [12 stitches total] Round 48: Work (2 single crochets, decrease) 3 times around [9 stitches total]
Cut the yarn, leaving a long tail for closing. Thread the tail through each of the 9 remaining loops, pull tight to close, and secure the end.
Piglet Amigurumi Crafting the Legs
The legs give your piglet stability and character. Using Almond yarn, make 4 identical legs:
Round 1: Create 6 single crochets in a magic ring [6 stitches total] Round 2: Increase in each stitch around [12 stitches total] Round 3: Work (3 single crochets, increase) 3 times around [15 stitches total]
Stuff the foot portion firmly, but keep the leg stuffing lighter.
Rounds 4-6: Work 1 single crochet in each stitch for 3 rounds [15 stitches remain] Round 7: Decrease 4 times, then work 7 single crochets [11 stitches total] Rounds 8-11: Work 1 single crochet in each stitch, finish with 1 slip stitch [11 stitches remain]
Cut the yarn, leaving a long tail for attaching to the body later.
Piglet Amigurumi Forming the Snout
The snout gives your piglet its distinctive look. Using Almond yarn:
Round 1: Chain 4 stitches Round 2: Working around both sides of the chain, work (increase, 2 single crochets) twice [8 stitches total] Round 3: Work 1 single crochet, increase, 3 single crochets, increase, 3 single crochets, finish with 1 slip stitch [10 stitches total]
Cut the yarn, leaving a long tail for attaching to the face.
Piglet Amigurumi Creating the Ears
The ears add personality to your piglet. Using Almond yarn, make 2 identical ears:
Round 1: Create 3 single crochets in a magic ring [3 stitches total] Round 2: Increase in each stitch around [6 stitches total] Round 3: Work 1 single crochet in each stitch [6 stitches remain] Round 4: Increase in each stitch around [12 stitches total] Round 5: Work (1 single crochet, increase) 6 times around [18 stitches total] Rounds 6-11: Work 1 single crochet in each stitch for 6 rounds [18 stitches remain] Round 12: Work (1 single crochet, decrease) 6 times around [12 stitches total]
Cut the yarn, leaving a long tail for attaching to the head.
Making the Trousers
The trousers add a charming detail to your piglet. Using Rose yarn:
Round 1: Chain 48 stitches Round 2: Form a ring by working 1 single crochet in the first chain, then work 47 more single crochets around [48 stitches total] Rounds 3-12: Work 1 single crochet in each stitch for 10 rounds [48 stitches remain] Round 13: Without breaking the yarn, chain 30 stitches for the strap
Cut the yarn, leaving a long tail for attaching the strap and button.
Crafting the Curly Tail
The curly tail adds a playful touch to your piglet. Using Almond yarn:
Round 1: Chain 21 stitches, then turn Round 2: Increase in each chain across (20 times) [40 stitches total]
Cut the yarn, leaving a long tail for attachment. When you sew this piece to the body, it will naturally curl into a spiral shape.
Creating Decorative Flowers
The flowers add charming detail to your piglet. Make three different sizes:
Large flower (using Rose yarn): Round 1: Chain 65 stitches, turn, then work 1 single crochet in each chain [64 stitches total]
Medium flower (using Yellow yarn): Round 1: Chain 45 stitches, turn, then work 1 single crochet in each chain [44 stitches total]
Small flower (using Blue yarn): Round 1: Chain 25 stitches, turn, then work 1 single crochet in each chain [24 stitches total]
Cut the yarn for each flower, leaving long tails for assembly. When attaching to the piglet, form each chain into a circle and then a spiral to create flower shapes.
Final Assembly
Now it’s time to bring all the pieces together:
- Using black lace yarn, embroider eyebrows above the eyes to give your piglet expression.
- Sew the ears onto the head at rounds 7-9, positioning them at a slight angle for a natural look.
- Attach the arms (front legs) to the body between rounds 27-30.
- Sew the back legs to the body between rounds 39-42.
- Place the trousers on the piglet, then sew between the legs (joining approximately 6 stitches) to create the trouser legs.
- Pull the strap over one shoulder to the front, then attach the button and secure the strap to complete the look.
- Sew the curly tail to the back of the trousers in the center.
- Attach the snout to the face with just a few stitches at the back edge, leaving the front edge free for a three-dimensional effect.
- Arrange and attach the flowers as desired – typically on the trousers or as a small bouquet.

Check this out :Adorable Easter Chicks Amigurumi Pattern
Your Completed Dotti the Piglet
Congratulations on creating your own Dotti the Piglet amigurumi! This charming character features sweet details that make it stand out from other amigurumi patterns. The combination of the almond-colored body with rose-colored trousers creates a delightful contrast, while details like the curly tail, expressive face, and decorative flowers add personality and charm.
Your handcrafted piglet makes a wonderful gift for children or collectors, or a delightful addition to your own handmade collection. The removable trousers add an interactive element that makes this amigurumi especially appealing.
Feel free to customize your piglet by changing yarn colors, adding different embellishments, or creating multiple piglets with varied expressions. The pattern provides a fantastic foundation for your own creative adaptations.
If you share your creation on social media, consider tagging the original designer to showcase your work and connect with other crafters who’ve enjoyed making Dotti the Piglet. Happy crocheting!


Leave a Reply